
Tutorial 2 – Static sprites
Step 1: Creating our sprite
First of all we will need a sprite that we can render:

Start Visual Studio and create a new Windows Phone Game (4.0) project and give it a decent name.
XNA Game Studio 4.0 got two projects when first created:
– The game project
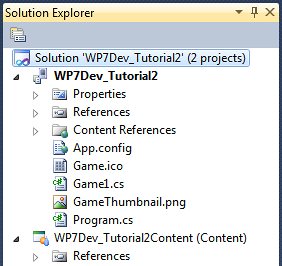
The Content References folder is used to reference a content project with your game project. When creating a new project using the Windows Phone template, a reference to the auto-generated content project is automatically added the Content References folder.

// This will contain our sprite.
Texture2D mySprite; // This is the coordinates of where we want to render our sprite.Vector2 spritePosition = new Vector2(100);
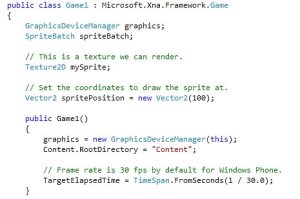
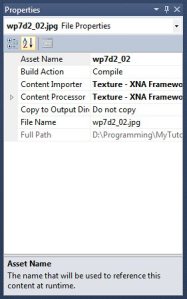
mySprite = Content.Load<
Texture2D>("wp7d2_02");What this does it to ask the Content project to return a object of the type Texture2D with the assetname of wp7d2_02, and store it in the mySprite variable.
Step 5: Render our sprite at the given coordinates
The last thing we need to do is to add some code that renders our sprite. This must be done in the Draw function of our game class. You might have noticed a object that is automatically added to our project, the spriteBatch object? This is what we will use to push sprites to our GPU for rendering. The spriteBatch contains a Begin and End function. To start rendering sprites, you will need to invoke the Begin function, then render all the sprites you want to render, and when you are done rendering sprites, you invoke the End method.
spriteBatch.Begin(
SpriteSortMode.BackToFront, BlendState.AlphaBlend);
spriteBatch.Draw(mySprite, spritePosition, Color.White);
spriteBatch.End();
As you can see from the code above, we begin rendering sprites by invoking the Begin method of our spriteBatch object, render our sprites using the Draw method of the spriteBatch object and end drawing sprites using the End() method of our spriteBatch object.
The parameters of Begin tells the spriteBatch to draw the first sprite behind the next sprite and so on. So the last sprite you draw will be the sprite that is on the top, and the BlendState is used to blend sprites together( more on this in a later tutorial ).
The first parameter of Draw is mySprite, the sprite we want to draw, the next is the 2d( x,y ) vector of where we want to draw our sprite, and the last is what color we want to have on the sprite. If you leave this to White, you will combine White with the color on our sprite which will not affect the color at all.
Next, let us change the color of our background from CornFlowerBlue to White by changing the following line of code:
GraphicsDevice.Clear(Color.White);
This line of code sets the background color of our game to white, hiding the white corners of our sprite as you can’t see through any part of the sprite yet.
I mentioned something about alpha earlier, and I won’t go in to spesific detailes yet, except that you can use alpha on a sprite to remove the parts of the sprite that you want to see through, making it possible to have an advanced image or a 3D space as you background to the sprite.
Your draw method should now look like this: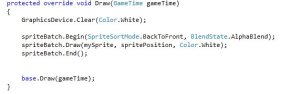
Now, if you press F5, you will see your game running, with a white background and your sprite standing still at position 100,100.
So that’s it for our static sprite rendering tutorial. I suggest you play around with the various parameters like setting the background color to different colors, the color on spriteBatch.Draw to something else, and even make your own sprite and render that!
Source/Binary: Tutorial 2.rar

